Monday crafts: how to make a paper kite
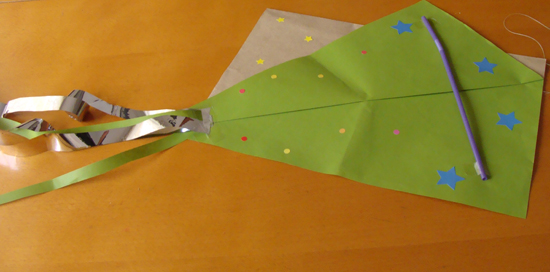
To make this kite you need a piece of thin paper, a string, adhesive tape, stickers, a straw and some scrap paper for the tail.
1. Cut a piece of paper into a rectangle shape and fold it so the shorter sides meet.
2. Make a pencil mark of 1cm from the top left corner and another at bottom right corner.
3. With a ruler connect the two marks and fold the paper outwards; turn the paper over and do the same on the other side.
 4. Turn the folded piece of paper over and attach a straw with tape on the wider end.
5. Cut 3 or 4 long ribbons of paper to make the tail and attach it with tape to the narrow side.
6. Make a hole on the spine to attach the string to fly the kite.
7. Decorate with stickers.
Happily shared with Kids Get Crafty.


A lovely idea, especially with Summer on its way!! This would also be a great way to “recycle” on of those main “painted pieces of paper” Pip Squeak is producing!!
Thanks for linking to Kids Get Crafty!
Maggy
Great post! Do you know schools pay lots on money for kite-making sessions? I do hope you will be able to pop over & link some of your great ideas to the Resource Centre. It is a space for ideas to help teachers! There’s even a badge if you fancy it! http://bit.ly/dLwwDC
Julia