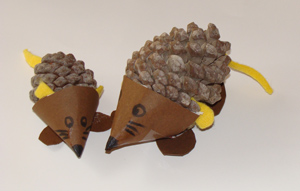
Monday Crafts: how to turn two pinecones into mummy and baby porcupine

Enough of that and back to the lovely pinecones we collected in the pinewood at the weekend. We returned home with a bag full, they are lovely for making animals, Christmas decorations and much more.
 Yesterday we made two lovely porcupines, mummy porcupine and baby porcupine. This is a very easy craft that kids can do on their own or with the help of a grown up depending on the age group. We made one each.
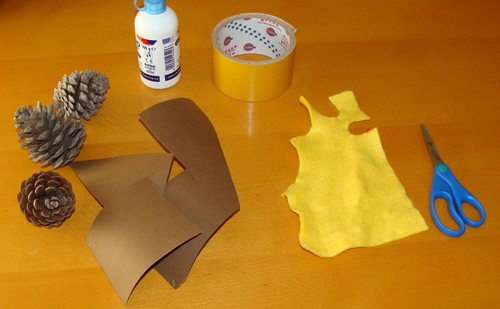
 Materials: empty pinecones all opened up, brown card, 1 black marker, yellow felt cuttings, glue, strong double tape, scissors.
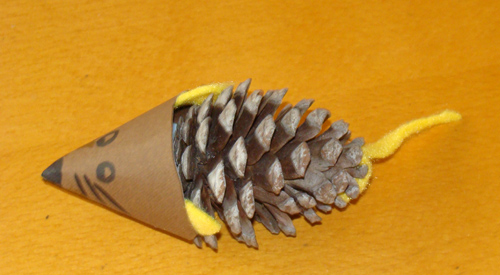
1. Cut a small square shape and fold the two extremities together to form a cone, which will be the face of the porcupine; secure with glue and leave to dry.
2. Decorate the cone with a black marker; cut pieces of double tape and attach it to the inside of the cone
3. Stick the cone to the bottom part of the pinecone, hold for a while for the double tape to get well attached
4. Cut two small ear shapes out of yellow felt and attach them on using the gaps in the pinecone; they will easily slide into position
5. Cut the tail out of yellow felt; cut a longer tail than you need; using the scissors split one of the extremities to tie up on one of the corns, it will be easier to tie a knot this way
6. Cut the feet out of cardboard and attach them to the bottom using double tape
This post takes part to Get Crafty weekly link up at Red Ted Art and to the Play Academy at the NurtureStore, where you’ll find more inspiring crafts to do with kids.


These are sooooooo cute and great for little hands to help!
Thanks fo linking up
Maggy
Oh, soo cute!
Those are so cute! My 3 year old picks up pinecones wherever he sees them and this will be perfect for some of the ones in his stash!
I love these!!! So, so cute!!!
Very cute! Now if only we could remember to bring the pine cones in from the car next time instead of leaving them there and stepping on them! LOL
Such cuties and great for this time of year. Thanks so much for sharing with the Play Academy.
These are so cute, we made our own version a while ago but yours look like actual hedgehogs – you just couldn’t be sure what exactly ours were lol
Hola, la version que hice del puerco espin, es la cabeza con plastelina de color,ponerle ojos y barnizarla, queda muy original y diferente,
saludos desde España
Josefina