How to make a picture frame out of cardboard
It’s been a while since I made something out of cardboard, which is rather strange considering the amount of cardboard I keep in my basement waiting for a repurposed life.
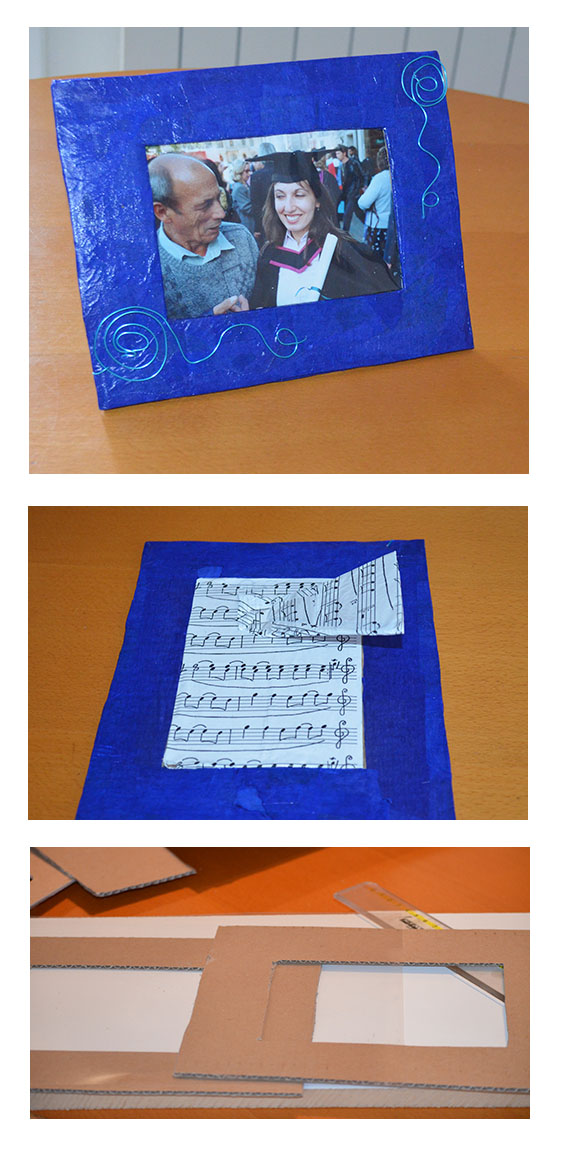
So here is a quick picture frame made out of cardboard, wire, tissue paper, glue and clear film.
- Cut two rectangles out of your piece of cardboard the size of the desired picture frame.
- Cut the hole of the photograph in both and keep one of the inner pieces to make the back of the frame.
- Decorate the front of one of the rectangles with the coloured tissue paper and glue; apply a few layers to harden the cardboard.
- Glue the clear film to the inside of the cardboard you have just decorated by applying a touch of glue to the edges(this will be your “glass” so try to keep it clean).
- Attach the other cardboard rectangle to the back and finish the decoration by applying more tissue paper and glue.
- Cover the inner piece you kept with a different colour paper and decoupage glue.
- Decorate the front of the frame with wire.
- Cut the picture frame back support to the size that best fits your frame and decorate it with the same paper used for the back piece.
- When dry, attach the back support to the back piece with a large stapler.
- Place your photo and display!


